
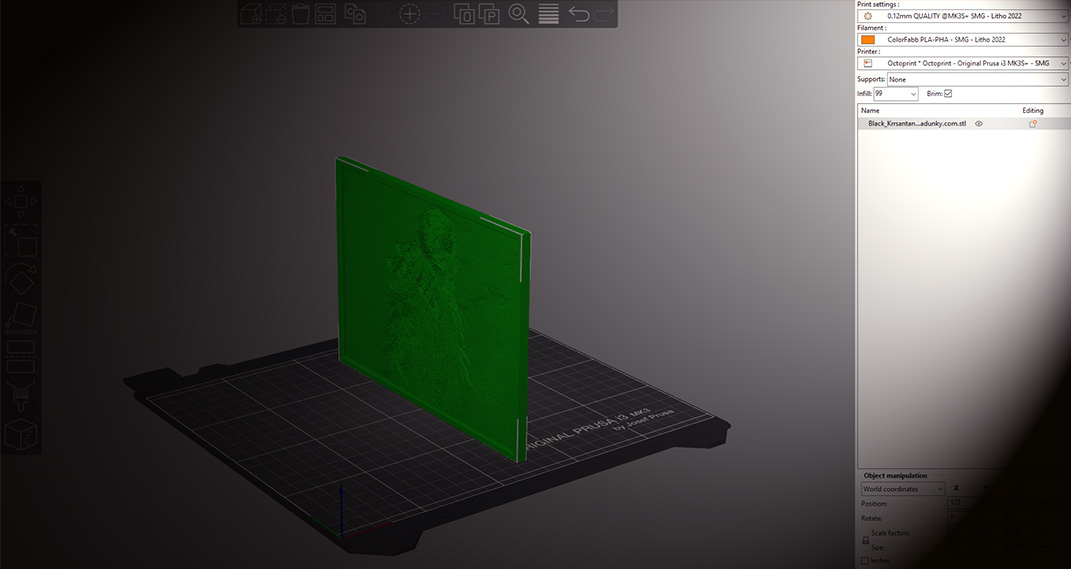
Information:
For resin lithophane settings please see this page.
To get the best results from our “Blaze” style lithophanes they need to be printed in an off white PLA or similar material(standard black and white style lithophanes work best with a cool white plastic). The warm looking lithophanes in our photos use Colorfabb Standard White PLA(or Gadunky LithoResin where stated), while the black and white style uses Colorfabb nGen White(we have also had good results with Eryone, eSUN and SUNLU PLA). If you want the warm/blaze style and use normal cool white plastic you won’t get the same look, even with a warm backlight(which is fine if printing a normal lithophane).
To check if your material is suitable for a warm/blaze style lithophane, shine a white torch or light through something flat that you’ve printed, it should look a slightly amber colour if its an off white material suitable for these lithophanes(the more amber it looks, the warmer your finished lithophane will look when backlit).
Once printed you can experiment with different backlights, for the Blaze look we use a bright warm LED lamp(normally 2500-2700k), the contrast can also be improved if you have a secondary white/cool LED. Checkout out our guide on colour temperatures here. How the end result looks all depends on the plastic you use and the type of backlight.
Recommended Print Settings:-
Layer Height: 0.1mm-0.12mm
It’s highly recommended you research the “magic number” for your printers Z axis and use a multiple of that. Prusa has a great calculator you can use. It’s been debated a lot whether this actually improves the quality of the print or not. But in testing we’ve seen a noticeable quality different on Creality and similar machines when using the “magic number”, but none on Prusa machines.
Perimeters/Walls/Shells: 12(or more if you are making a particularly thick lithophane) to allow mostly walls, the infill will take care of the rest(large frames, base sections etc).
Infill: Rectilinear – 99%, not 100%*
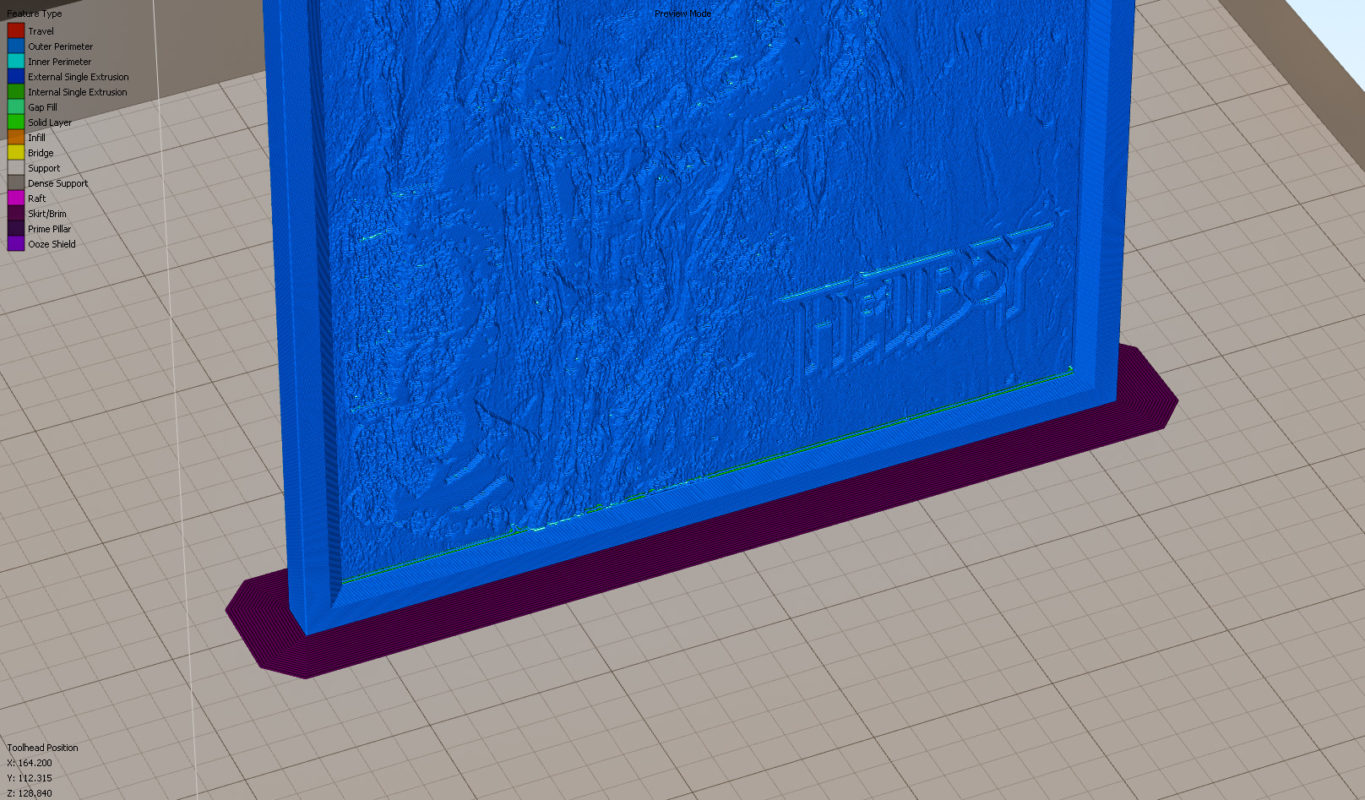
Bed Temperature: First layer should be 60-65c for PLA, then 55c for the remainder of the print. This keeps the PLA stuck to the bed but stops some curling, elephant foot and general distortion of the base edges that can happen when printing with a 60-65c bed for the whole print(some slicers like PrusaSlicer offer elephant foot compensation to help mitigate this issue). A brim is also vital as it helps hold the lithophane in place (18-20 brim outlines should be enough). In S3D there’s an option for multiple brim layers(it’s actually called “Skirt layers”), setting this to 3 or 4 gives you a strong brim that peels off easily when the print is complete.

PrusaSlicer settings(recommended slicer):-
Speed:
Perimeters: 35mm/s
External perimeters: 25mm/s
Infill Speed: 40mm/s
Top solid infill : 40mm/s
Travel Speed: 100mm/s
First layer speed: 20mm/s
Acceleration:
Perimeters: 300mm/s2
Infill: 600mm/s2
Bridge: 600mm/s2
First Layer: 800mm/s2
Default: 600mm/s2
Other/Misc:
Avoid crossing perimeters: Yes
Detect thin walls: Yes
Seam position: Aligned
Fill Gaps: Yes
Lift Z: Off
These settings are just a guideline(based on a Prusa MK3S+ printer), your printer settings may be slightly different.
Cura settings:-
Speed:
Infill Speed: 45mm/s
Outer Wall Speed: 30mm/s
Inner Wall Speed: 30mm/s
Top/Bottom Speed: 25mm/s
Travel Speed: 90mm/sec
Initial layer Speed: 18mm/s
Initial Travel Speed (for the first 1-2 layers): 60mm/s
Acceleration:
Outer Wall: 300mm/s2
Inner Wall: 400mm/s2
Infill: 600mm/s2
First Layer: 800mm/s2
Print Acceleration(default): 600mm/s2
Other/Misc:
Print Thin Walls: Yes
Fill Gaps Between Walls: Everywhere
Combing Mode: All
Z Seam Alignment: Sharpest Corner
Seam Corner Preference: Hide Seam
These settings are just a guideline, your printer settings may be slightly different.
Simplify3D settings:-
Speed:
Default Printing Speed: 50mm/s
Outline Underspeed: 60%
Solid Infill Underspeed: 80%
Support Structure Underspeed: 70%
X/Y Axis movement: 100mm/sec
Z Axis movement: 16.7mm/s
First Layer Speed: 40%
Acceleration:
Due to the way S3D works you need to specify the acceleration and jerk settings via the built in scripting engine tabs.
| Starting Script:
M201 X600 Y600 Additional terminal commands for post processing: {REPLACE “; feature inner perimeter” “; inner perimeternM204 S300nM205 X12 Y12”} {REPLACE “; feature outer perimeter” “; outer perimeternM204 S300nM205 X12 Y12”} {REPLACE “; feature solid layer” “; solid layernM204 S300nM205 X12 Y12”} {REPLACE “; feature infilln” “; feature infillnM204 S300nM205 X12 Y12”} |
These settings are just a guideline, your printer settings may be slightly different.
Optional settings if possible with your Printer/Slicer.
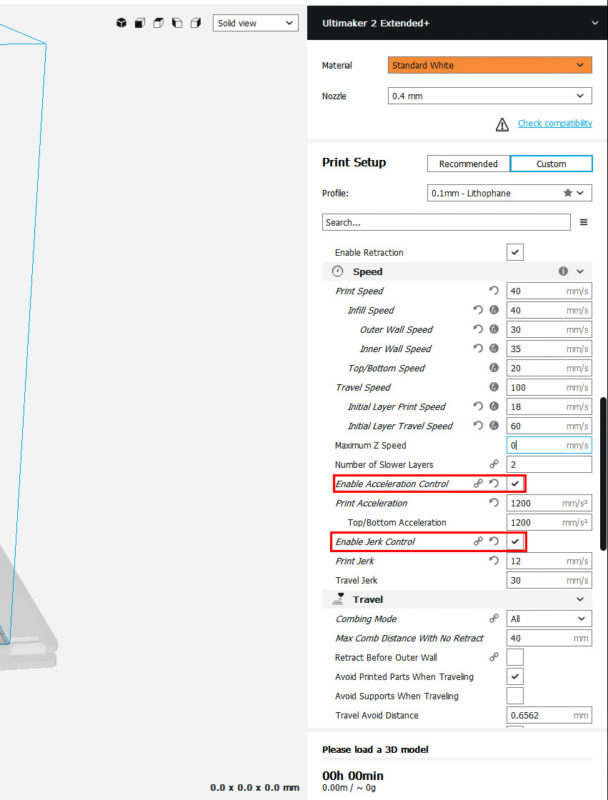
These are mostly PrusaSlicer/Simplify3D/Cura and Raise3D, Prusa MK3S+, Ultimaker 2+, 3+ and S5 specific settings (other printers might require different speeds). In S3D use the “Starting Script” section in “Scripts” to add the required acceleration and jerk values, in Cura make sure the Acceleration and Jerk Control settings are enabled(see below pics).
Acceleration: 800mm/S2 (Ultimaker default is usually 3000-5000mm/S2) – If you’ve a Creality printer like the Ender 3, Ender 3 V2, CR-10 or one of it’s variants, the acceleration should be 300mm/S2. If you want extremely high quality lithophanes on your Ultimaker/Raise3D or similar high end 3D printers and are willing to put up with a lot of extra print time you can set the acceleration to 300-400mm/S2.
Jerk: 10mm/s (default is usually 20mm/s) – If you have a Creality printer like the CR-10 or it’s variants, the Jerk should be 7-8mm/s.

A note on slicing our lithophanes in Simplify3D:
It’s easiest to slice our pre-made lithophane STL files in PrusaSlicer or Cura as there’s an extra step in Simplify3D due to the way the lithophanes are created.
If you want to use Simplify3D you just need to do the following:
1. Load the lithophane STL into S3D as normal.
2. Click Mesh-Separate Connect Surfaces
3. Slice as normal.
The added bonus of doing this is you can re-crop the lithophane into the frame if you wish, or easily resize or remove the frame altogether. You can also print the frame in one material/colour and the lithophane in another using this method(if your printer supports this).If you don’t do the above in S3D there may be a tiny gap between the frame and the lithophane when you actually slice the model.
This is mainly for the older V4 version of S3D as we are still testing how the new V5 released in December 2022 handles our pre-made lithophanes.
If you have problems slicing/printing or just want a known good lithophane slicer profile, we have some below for download.
These downloadable profiles are not updated as often as the information on this page. If a profile isn’t available for your printer or the profile itself is out of date just make a new lithophane profile in your slicer and use the speed/acceleration and other settings on this page as guide.
Cura 4.xx Profiles
You may need to adjust some or all of the above settings to match your own printer/setup, but they’re an excellent starting point.
*1% might not seem like much, but it can really change the behaviour of your slicing engine(PrusaSlicer, Cura, S3D etc). It’s really only useful when printing larger lithophanes that have frames as part of the 3D model(especially advanced lithophanes like lamp shades or globes with thick base sections). The wall settings we recommend cover the lithophane itself and it’s rare that there’s any actual infill in those, it’s all just walls/shells. But the frames/base sections can be big and take up a lot of print time. Changing the infill to 99% can save you an hour or more over the length of a 20-24 hour print(not always, but quite often). This is in Cura mostly, although we’ve seen similar results in Simplify3D and PrusaSlicer.
PrusaSlicer v2.5 and newer seems to have reduced this issue, and the December 2022 release of Simplify3D V5 has similarly reduced the issue with its updated slicing engine.